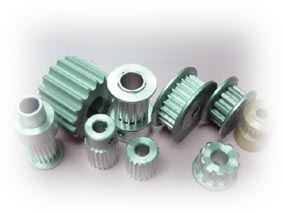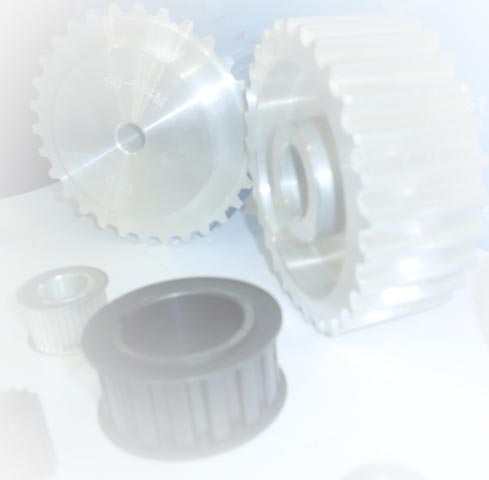

Note when checking form and order pulley:
1. Belt and pulley of our company can be
attachment or replacement of imported belt and
pulley.
2.
Please supply drawing when you order. We can also draw for clients as
their
supplied specification, hole, key way and
width.
3.
The tolerance of outside diameter, end bounce 7 wrap direction of pulley should
conform
to Form1,form 2 &
form3.
4.
Width of different specification of timing belt and pulley must conform to
form4.
5.
Outside diameter of pulleys and size should be as form's
regulation.
6.
We can also produce pulleys even sizes are not in the
form.
7. The
material of pulley mainly composed of carbon steel, if
possible aluminum alloy nylon
can
also be employed; if external diameter is larger than 250 mm, iron is
used.

Representation of pulley
representation of T type pulley representation of ARC tooth representation of German T type pulley

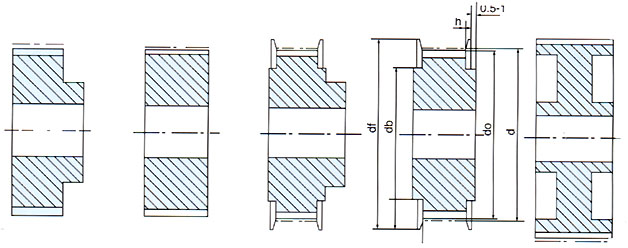
Stype Stype Ftype Ftype
Wtype
Dimension of HTD type pulley(mm)

| type | pb | ht | R | S | r | angle |
| 3M | 3 | 1.28 | 0.91 | 1.90 | 0.3 | 14º |
| 5M | 5 | 2.16 | 1.56 | 3.25 | 0.48 | 14º |
| 8M | 8 | 3.54 | 2.57 | 5.35 | 0.8 | 14º |
| 14M | 14 | 6.20 | 4.65 | 9.80 | 1.4 | 14º |
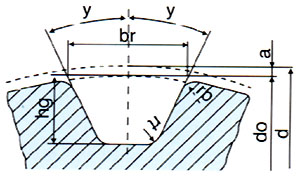
Dimension of HTD type pulley(mm)
| type | type |
V Grad |
rd | rt | 2a | |||||||
|
SE br |
N br |
SE hg |
N hg |
|||||||||
| difference | difference | difference | difference | |||||||||
| T2.5 | 1.75 | +0.05 | 1.83 | +0.05 | 0.75 | +0.05 | 1 | 25 | 0.2 | 0.3 | +0.05 | 0.53 |
| 0 | 0 | 0 | 0 | |||||||||
| T5 | 2.96 | +0.05 | 3.32 | +0.05 | 1.25 | +0.05 | 1.95 | 25 | 0.4 | 0.6 | +0.05 | 0.85 |
| 0 | 0 | 0 | 0 | |||||||||
| 10 | 6.02 | +0.1 | 6.57 | +0.1 | 2.6 | +0.1 | 3.4 | 25 | 0.6 | 0.8 | +0.1 | 1.85 |
| 0 | 0 | 0 | 0 | |||||||||
| 20 | 11.65 | +0.15 | 12.6 | +0.15 | 5.2 | +0.13 | 6 | 25 | 0.8 | 1.2 | +0.1 | 2.85 |
| 0 | 0 | 0 | 0 | |||||||||
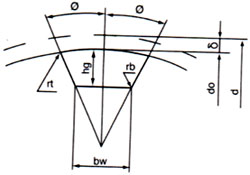
Dimension & tolerance of linear type pulley(mm)
| type | bw | hg | Ø+1.5º | rb | rt | 2 |
| MXL | 0.85±0.05 | 0.69 | 20 | 0.35 | 0.13 | 0.508 |
| XXL | 1.14±0.05 | 0.84 | 25 | 0.35 | 0.30 | 0.508 |
| XL | 1.32±0.05 | 1.65 | 20 | 0.41 | 0.64 | 0.508 |
| L | 3.05±0.10 | 2.67 | 20 | 1.19 | 1.17 | 0.762 |
| H | 4.19±0.13 | 3.05 | 20 | 1.60 | 1.6 | 1.372 |
| XH | 7.90±0.15 | 7.14 | 20 | 1.98 | 2.39 | 2.794 |
| XXH | 12.17±0.18 | 10.31 | 20 | 3.96 | 3.18 | 3.048 |
Pitch tolerance(mm)
| outside diameter pitch | difference allowed | |
| gap | gap allowed in 90º | |
| <25.40 | 0.03 | 0.05 |
| >25.40-50.80 | 0.03 | 0.08 |
| >50.80-101.60 | 0.03 | 0.10 |
| >101.66-177.80 | 0.03 | 0.13 |
| >177.80-304.80 | 0.03 | 0.15 |
| >340.80-508.00 | 0.03 | 0.18 |
| >580.00 | 0.03 | 0.20 |
Tolerance of outside diameter of pulley(mm)
| outside diameter | outside diameter |
| <25.40 |
+0.05 0 |
| >25.40-50.80 |
+0.08 0 |
| >50.80-101.60 |
+0.10 0 |
| >101.60-177.80 |
+0.13 0 |
| >177.80-304.80 |
+0.15 0 |
| >304.80-508.00 |
+0.18 0 |
| >508.00 |
+0.20 0 |
Allowable bounce of pulley end(mm)
| outside diameter | allowable bounce |
|
<101.60 >101.60-254.00 >254.00 |
0.10 outside diameter×0.001 0.25+[(outside diameter-254.00)×0.005] |
Allowable bounce of pulley warp direction(mm)
| outside diameter | allowable bounce |
|
<203.20 >1203.20 |
0.13 outside diameter×0.001 0.13+[(outside diameter-203.20)×0.005] |
